This post will outline the drawing of the eye in profile.
Step One - A triangle
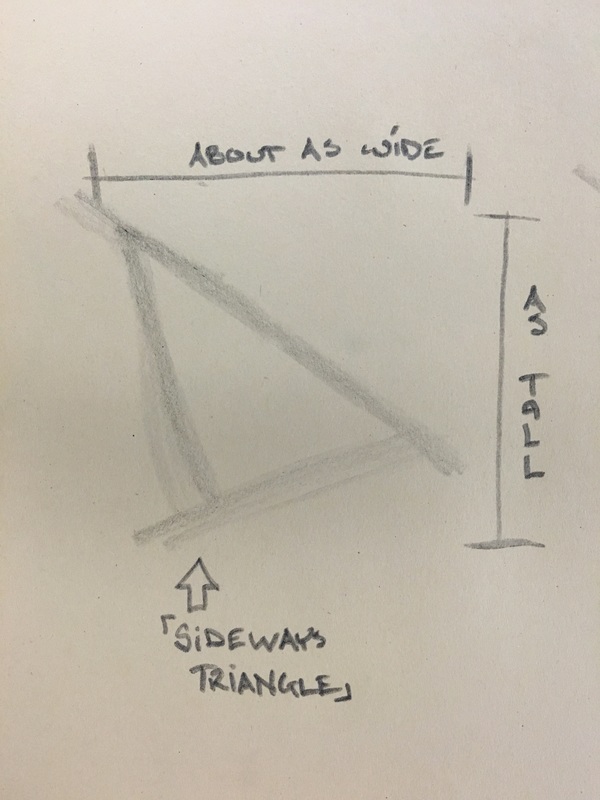
The eye in profile takes on the shape of a slanted triangle, the top is slightly longer than the bottom, and the side slants back into the head just a bit. The height will be slightly less than the width - use your judgement.
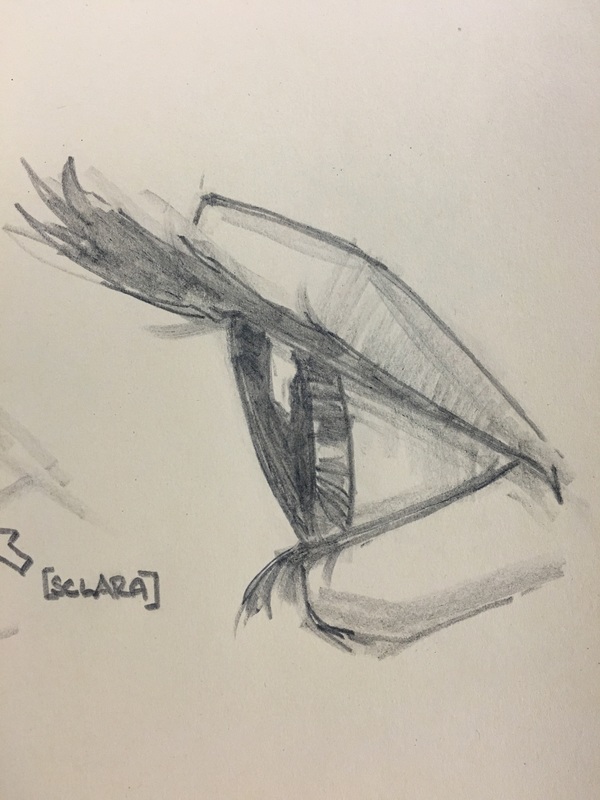
Step two - Parts!

The eye can be broken up into five parts that we should pay attention to when drawing:
For now, we will LIGHTLY sketch these parts in as we see them. In some people, especially those with darker eyes, it may be hard to see where the iris ends and the pupil begins. If this is the case, DON'T MAKE IT UP, just draw what you see, and if you have to combine them - that's fine. Typically, the iris will end about a quarter (1/4) to a third (1/3) of the way back from the front of the eye.
When drawing the lashes, DO NOT draw individual lashes - draw all of the lashes TOGETHER and treat them as one shape.
- The Sclera - or white of the eye. (I spelled this wrong on my drawing...apologies.)
- The Iris - the colored part of the eye.
- The Pupil - the black center.
- The Lids - Top and bottom.
- The Lashes - Top and bottom.
For now, we will LIGHTLY sketch these parts in as we see them. In some people, especially those with darker eyes, it may be hard to see where the iris ends and the pupil begins. If this is the case, DON'T MAKE IT UP, just draw what you see, and if you have to combine them - that's fine. Typically, the iris will end about a quarter (1/4) to a third (1/3) of the way back from the front of the eye.
When drawing the lashes, DO NOT draw individual lashes - draw all of the lashes TOGETHER and treat them as one shape.
Step 3 - Finishing
To finish the drawing, go back over all of your sketched lines and sharpen them by looking at the EDGES of your model's eye. Pay close attention to the direction of the curves in the eyelids and the overall shape of the lashes.
 RSS Feed